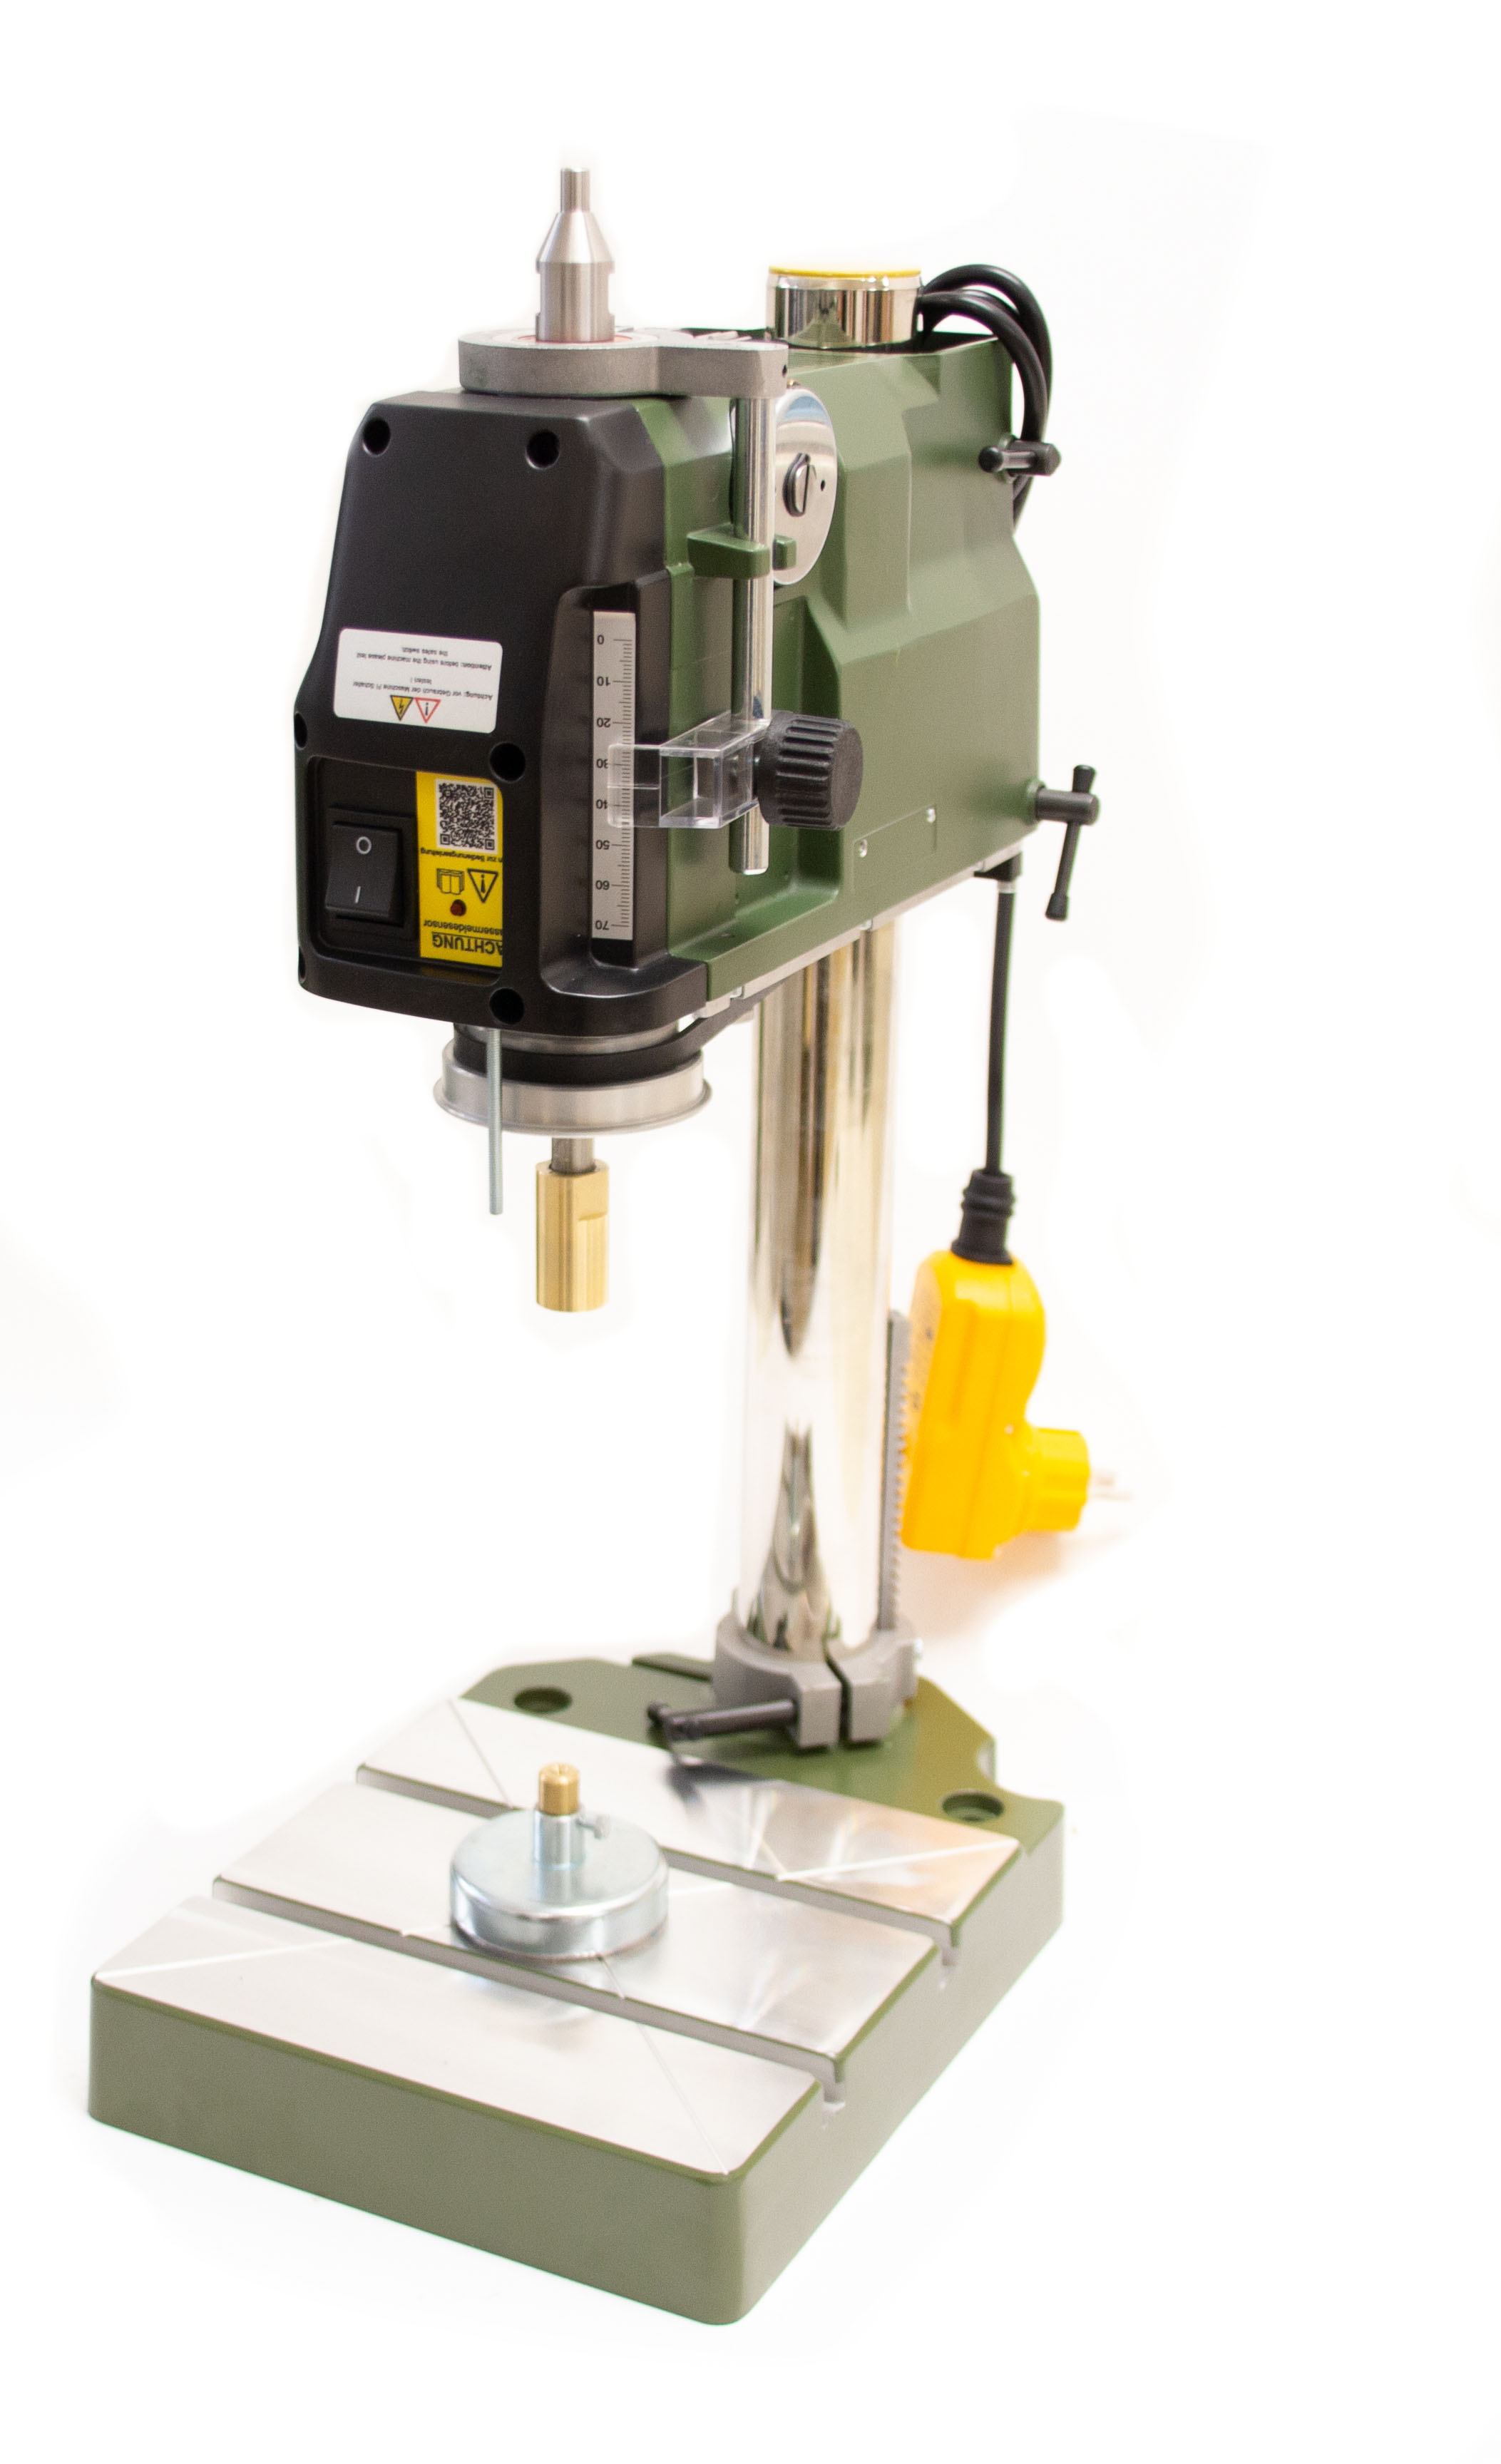
Setting up the TBH Pro 3 bench drill

Until a few years ago, drilling with diamond hollow drills in various materials was a profession that had to be learned, and it goes without saying that you have to gain your own experience at the beginning. We will show you how to use it correctly here in our online shop.
The Professional drilling machine is a specially developed machine for drilling materials such as glass, quartz, ceramics, precious stones of all kinds (except diamond) and solid carbide with diamond hollow drills.
The drill has a powerful 220 - 240 V permanent magnet motor and a spindle drive via a triple pulley with poly-V belt. This brings the very important advantage of almost 6 times the torque in the lower speed range (for large drilling diameters). Quill feed for sensitive work and practical drilling depth display with an adjustable stop and a precision-mounted drill spindle.
To protect your surroundings from water splashes, you should place the machine in a splash guard. To protect yourself, it is advisable to wear a water-repellent apron.

The height adjustment:


Preparation

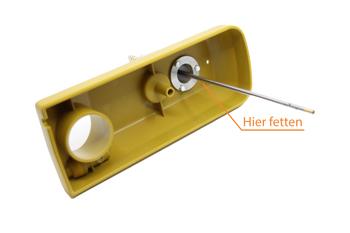
Grease sealing rings
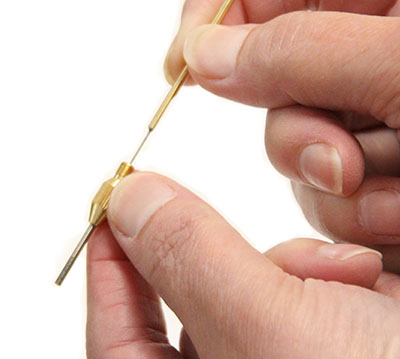
Grease the water rod
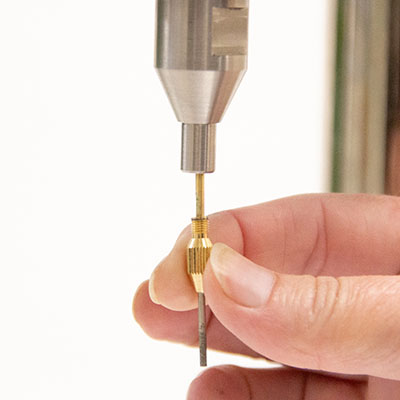
Diamond drill
Our drills are always supplied with an ejector needle. During the drilling process, this ejector needle is pushed back and when it is driven out of the hole, it is pressed down again by the stop on the water rod and thus ejects the drill plug. The diamond hollow drills are soldered into a holder. This mount is called type "F" and has a 4x0.5 mm thread at the rear end. The ejector is inserted into the holder from behind and should protrude approx. 1mm over the edge of the drill. The drill is screwed into the machine together with the ejector needle and tightened hand-tight or slightly with pliers. (images similar)
Now slide the water rod all the way down until it touches the ejector needle. You can now tighten the union nut 1 slightly with a wrench.
Important: The water rod is cooled by the water flowing through it at the friction points of the Simmerrings. To avoid damage to the water rod and Simmerrings, NEVER operate the drill without water. For dry drilling, the water rod must be removed.
The machine is now ready to carry out various drilling jobs. There are different drilling options.
• Pierce
• Drilling
• Ball drilling
Different preparations must be made for these species. First we set up the machine for piercing. The problem here is that the drill hole breaks out when drilling through from one side. That's why we're drilling here from two sides.


Attach water hose

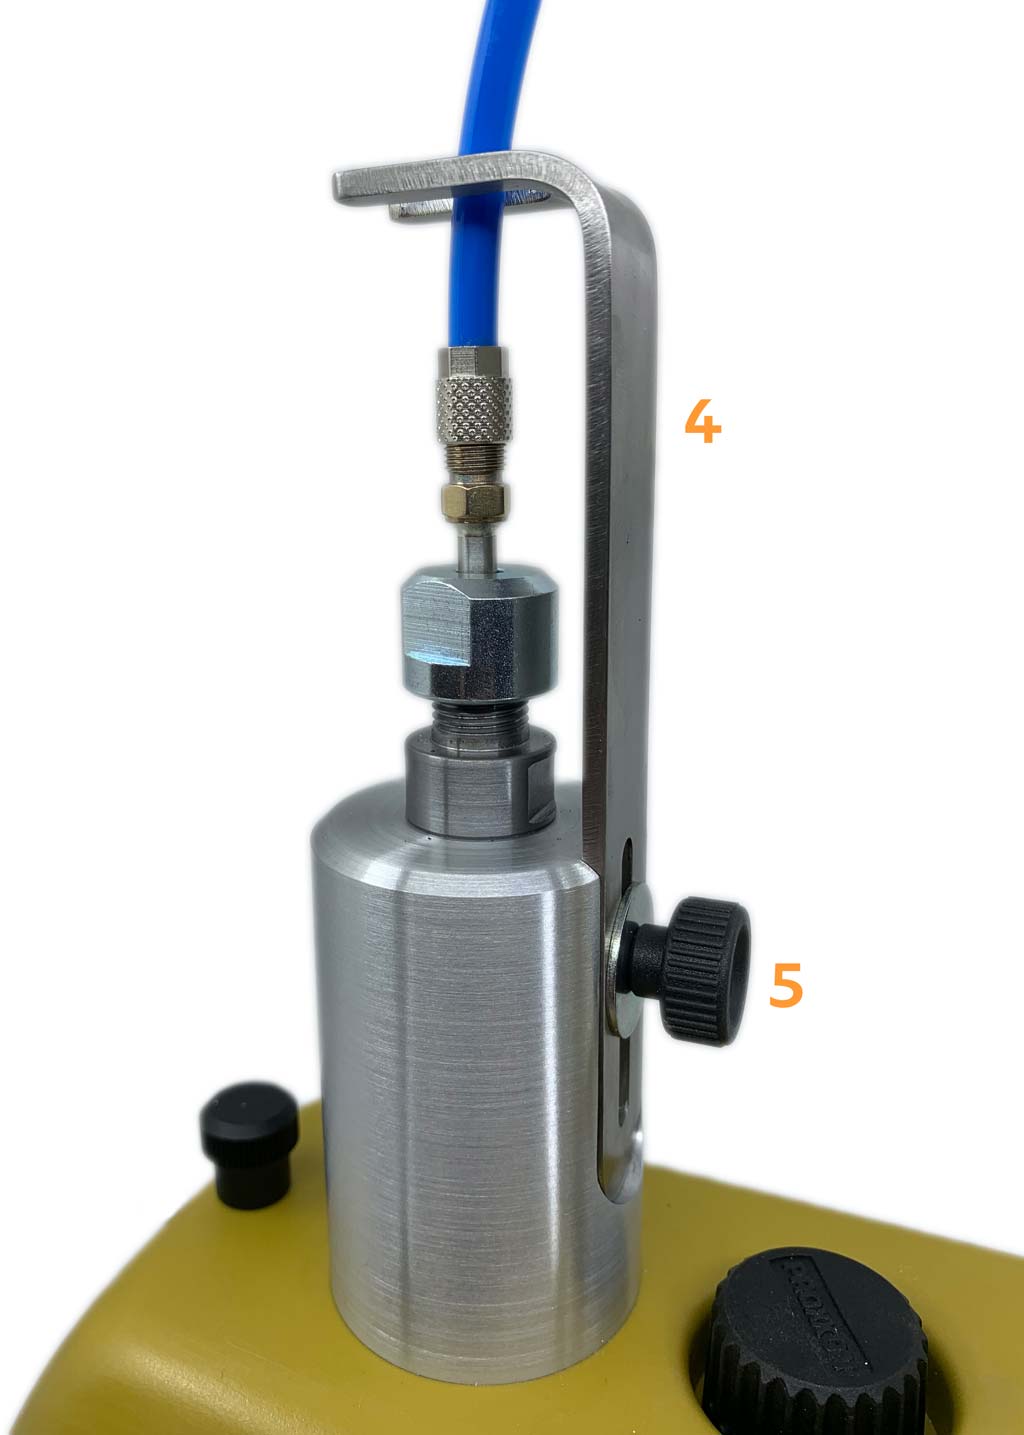
Flooding stop
(only for machines from 03.2022)
Slide the Flooding Stop (4) over the Water Rod (2) as shown in the picture on the left.
Note that the hose (1) is enclosed in the middle of the flooding stop.
Now fix the flooding stop with the fastening knob (5).
For info:
It may be necessary to correct the fit upwards after inserting the diamond drill with ejector needle.

establish a water supply
The counterpart


Here we go !
drill balls


Fehlerbehebung:
Water Guard:
- Immediately switch off the machine and disconnect it from the power supply.
- Remove the cover.
- Remove water with a cloth.
- If necessary, turn the machine upside down to dry (see illustration).
- Check the machine for moisture.
- Check the shaft seals and replace if necessary.
- Check the water stick for wear and replace if necessary.